
Crimped end fuel lines leaking, repair them
A common thing I’ve run across on these 80s and 90s Japanese cars Is crimped end fuel line. They’ll often have a threaded connection that will connect to the hard line from under the car and then a banjo fitting or some other type of specific fitting for the fuel rail or fuel filter.
Over time these like to dry rot and split or get pin holes in them. Now 30 years on, some of them are NLA, which is annoying or they are expensive.
I pulled the Montero out of winter storage a few years ago and started it, the main fuel hose in the engine compartment feeding the fuel rails had a pin hole leak and was spraying on the manifold. Very much not ideal.
I tried and failed to order the correct one from Megazip, I honestly don’t know why I didn’t use the VIN. I guessed and wasted $115. However my mistake is your gain.
Friend of Auto Off Topic Ronlp on instagram suggested I do the method I’m about to share with you. It’s a damn good trick for owning these old cars, I’ve turned several people on to doing it this way. It feels like a Kludge, but I think it’s a valid way to repair these hoses. These hoses have crimped ends and you could spend a bunch of time and money trying to find a hydraulic shop willing to make new ones or do it this way with a little patience.
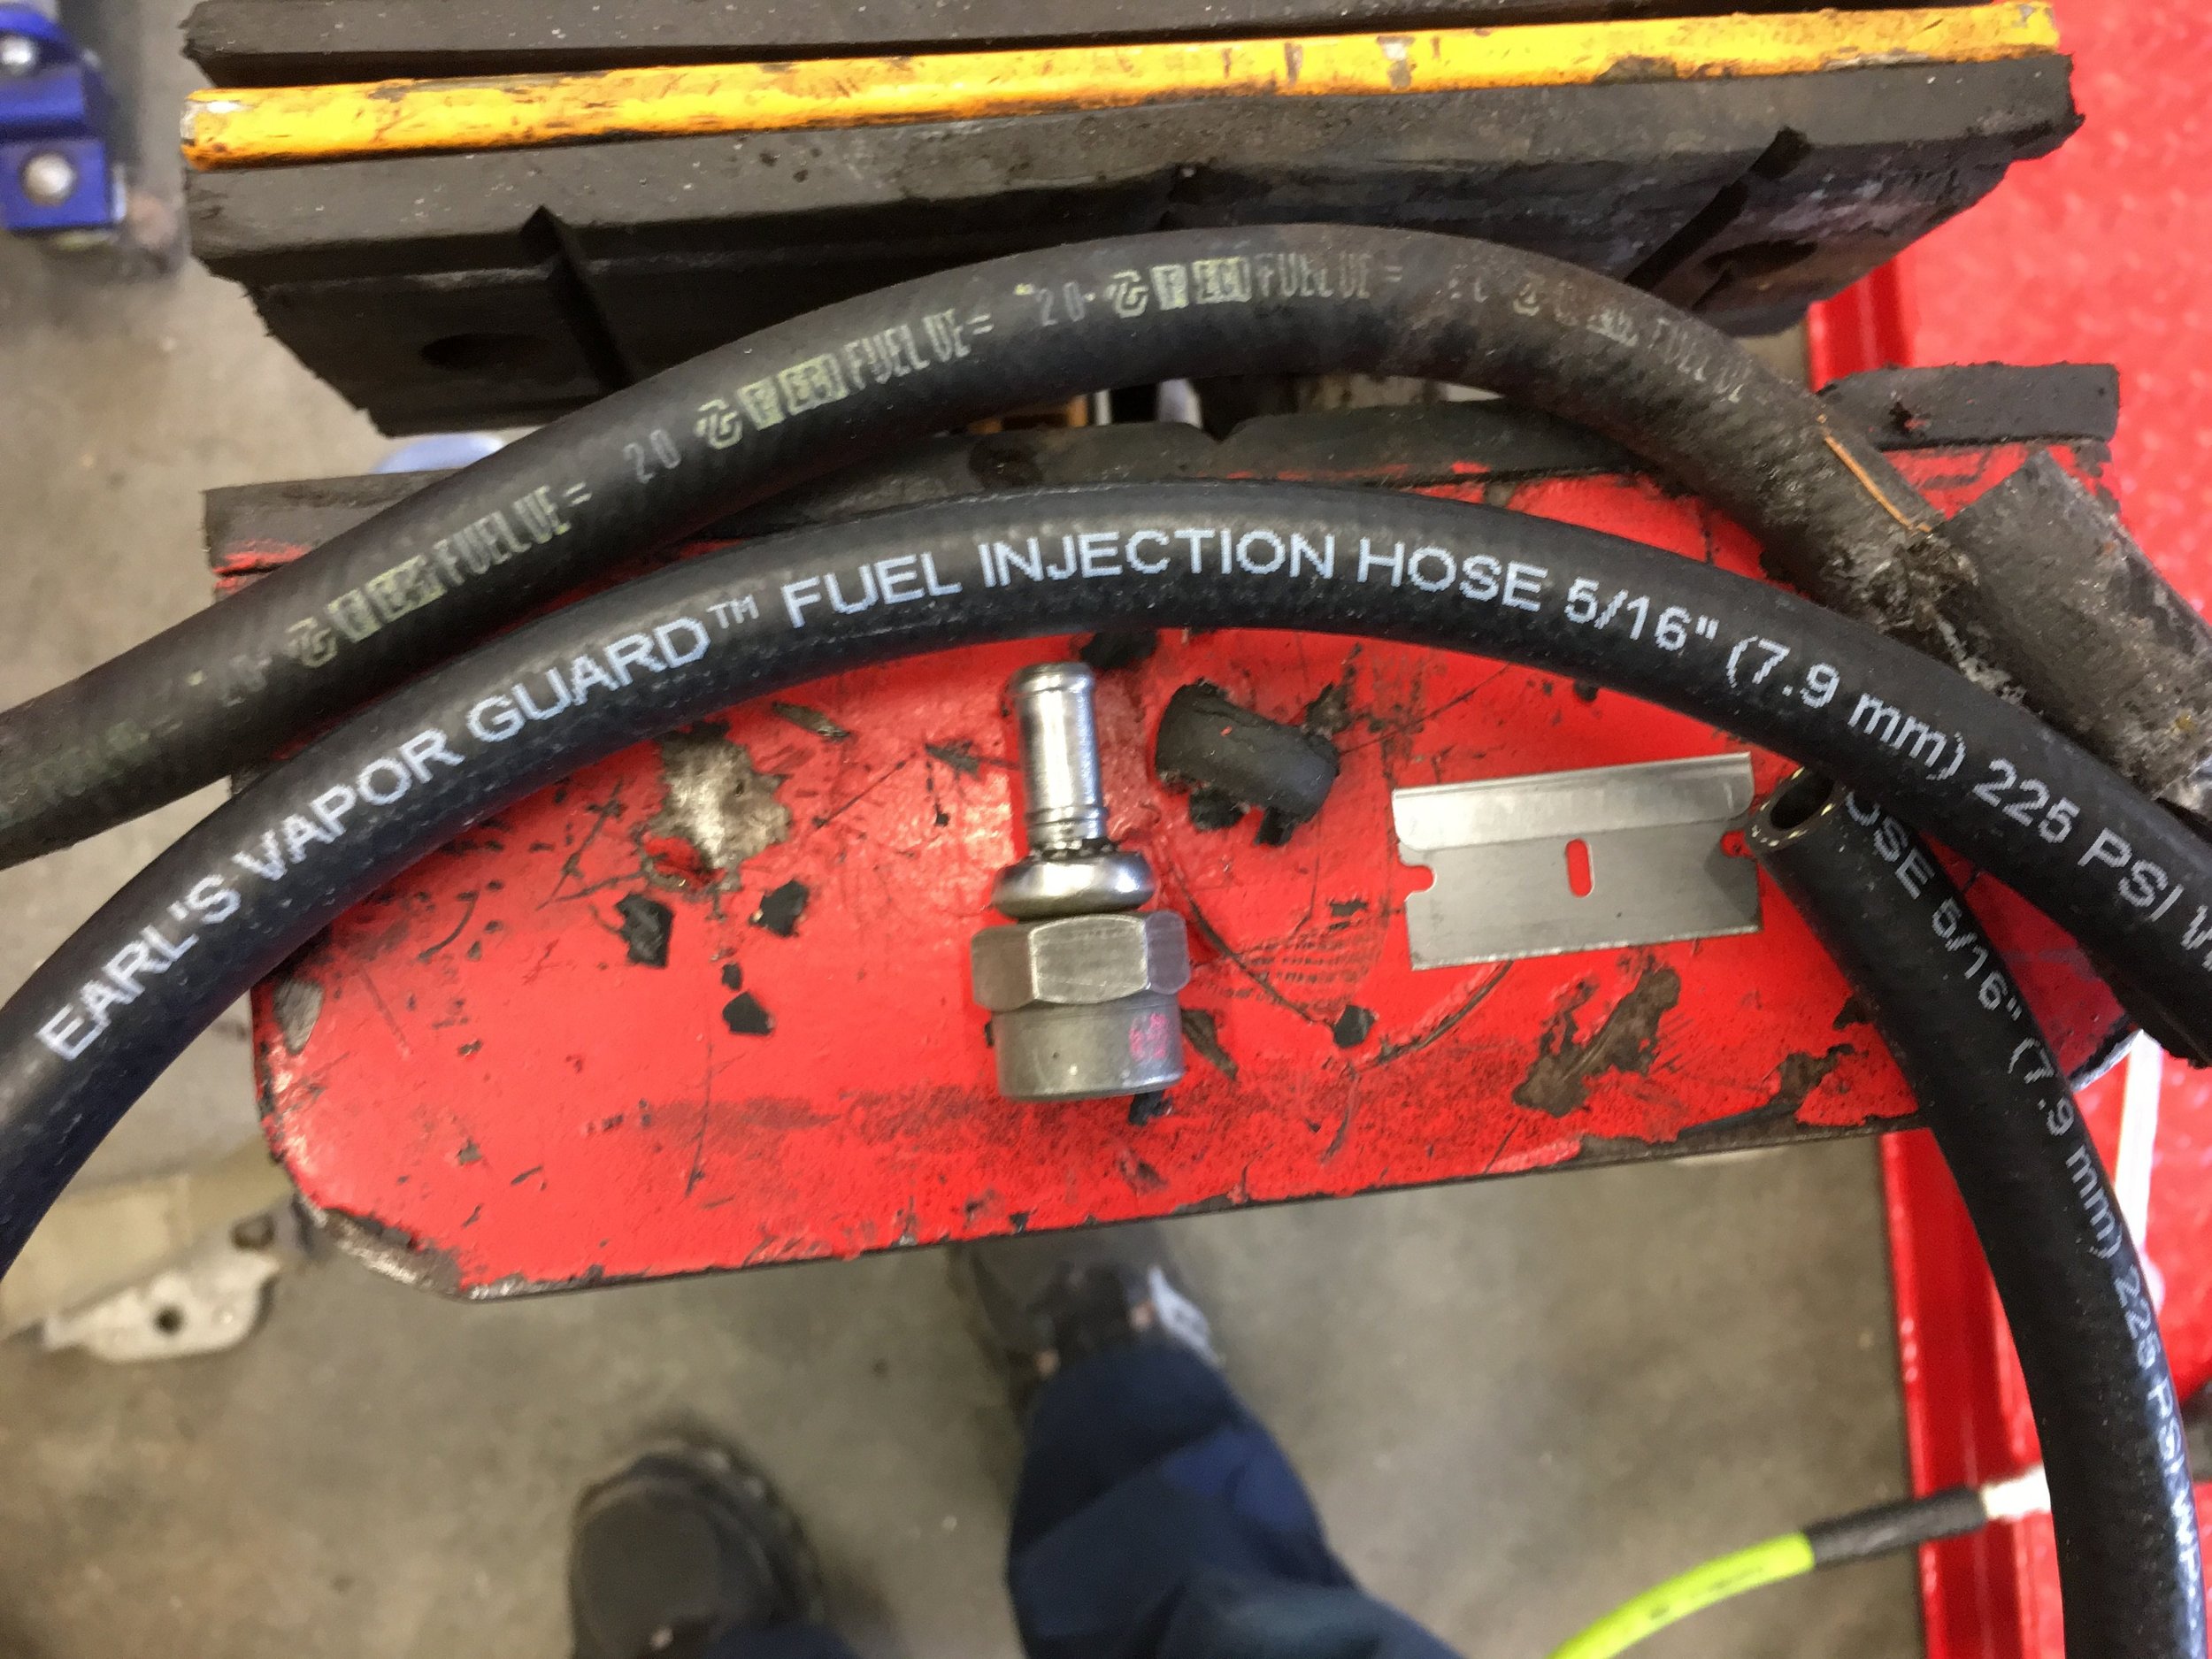
You will need a bench vice, cut off wheel, vice grips and wire wheel and appropriate fuel injection hose. I like Earl’s Vapor guard EFI hose and some good fuel injection hose clamps, you can use Earl’s brand or the Summit generic equivalent. Worm clamps from Harbor Freight won’t work. You’ll also have to figure out the line size, 5/16th (8mm) I.D. hose worked well for me here.

You can see the offending line here with some duct tape around it, it’s a specialized line with a long portion of hard line to reach the fuel rails. Not exactly a parts store piece.
Quick safety note: Obviously if you’re going to work with some fuel lines here, no open flames, and work in well ventilated area. If it’s leaking, there probably isn’t a lot of pressure built in the lines, but wrap a rag around connections before cracking them free so you don’t get sprayed with gas. Use common sense here people.
With all the parts in hand, I pull the busted line and put one end in the bench vice.

Here we see the crimped end.
This is where you are going to be a surgeon with a cut off wheel, you could use a small rotary tool if you want more control, but that might take longer.
Carefully work around the fitting and grind the crimps away. DO NOT CUT THROUGH the fitting. There is a barb part inside that we want to reuse.
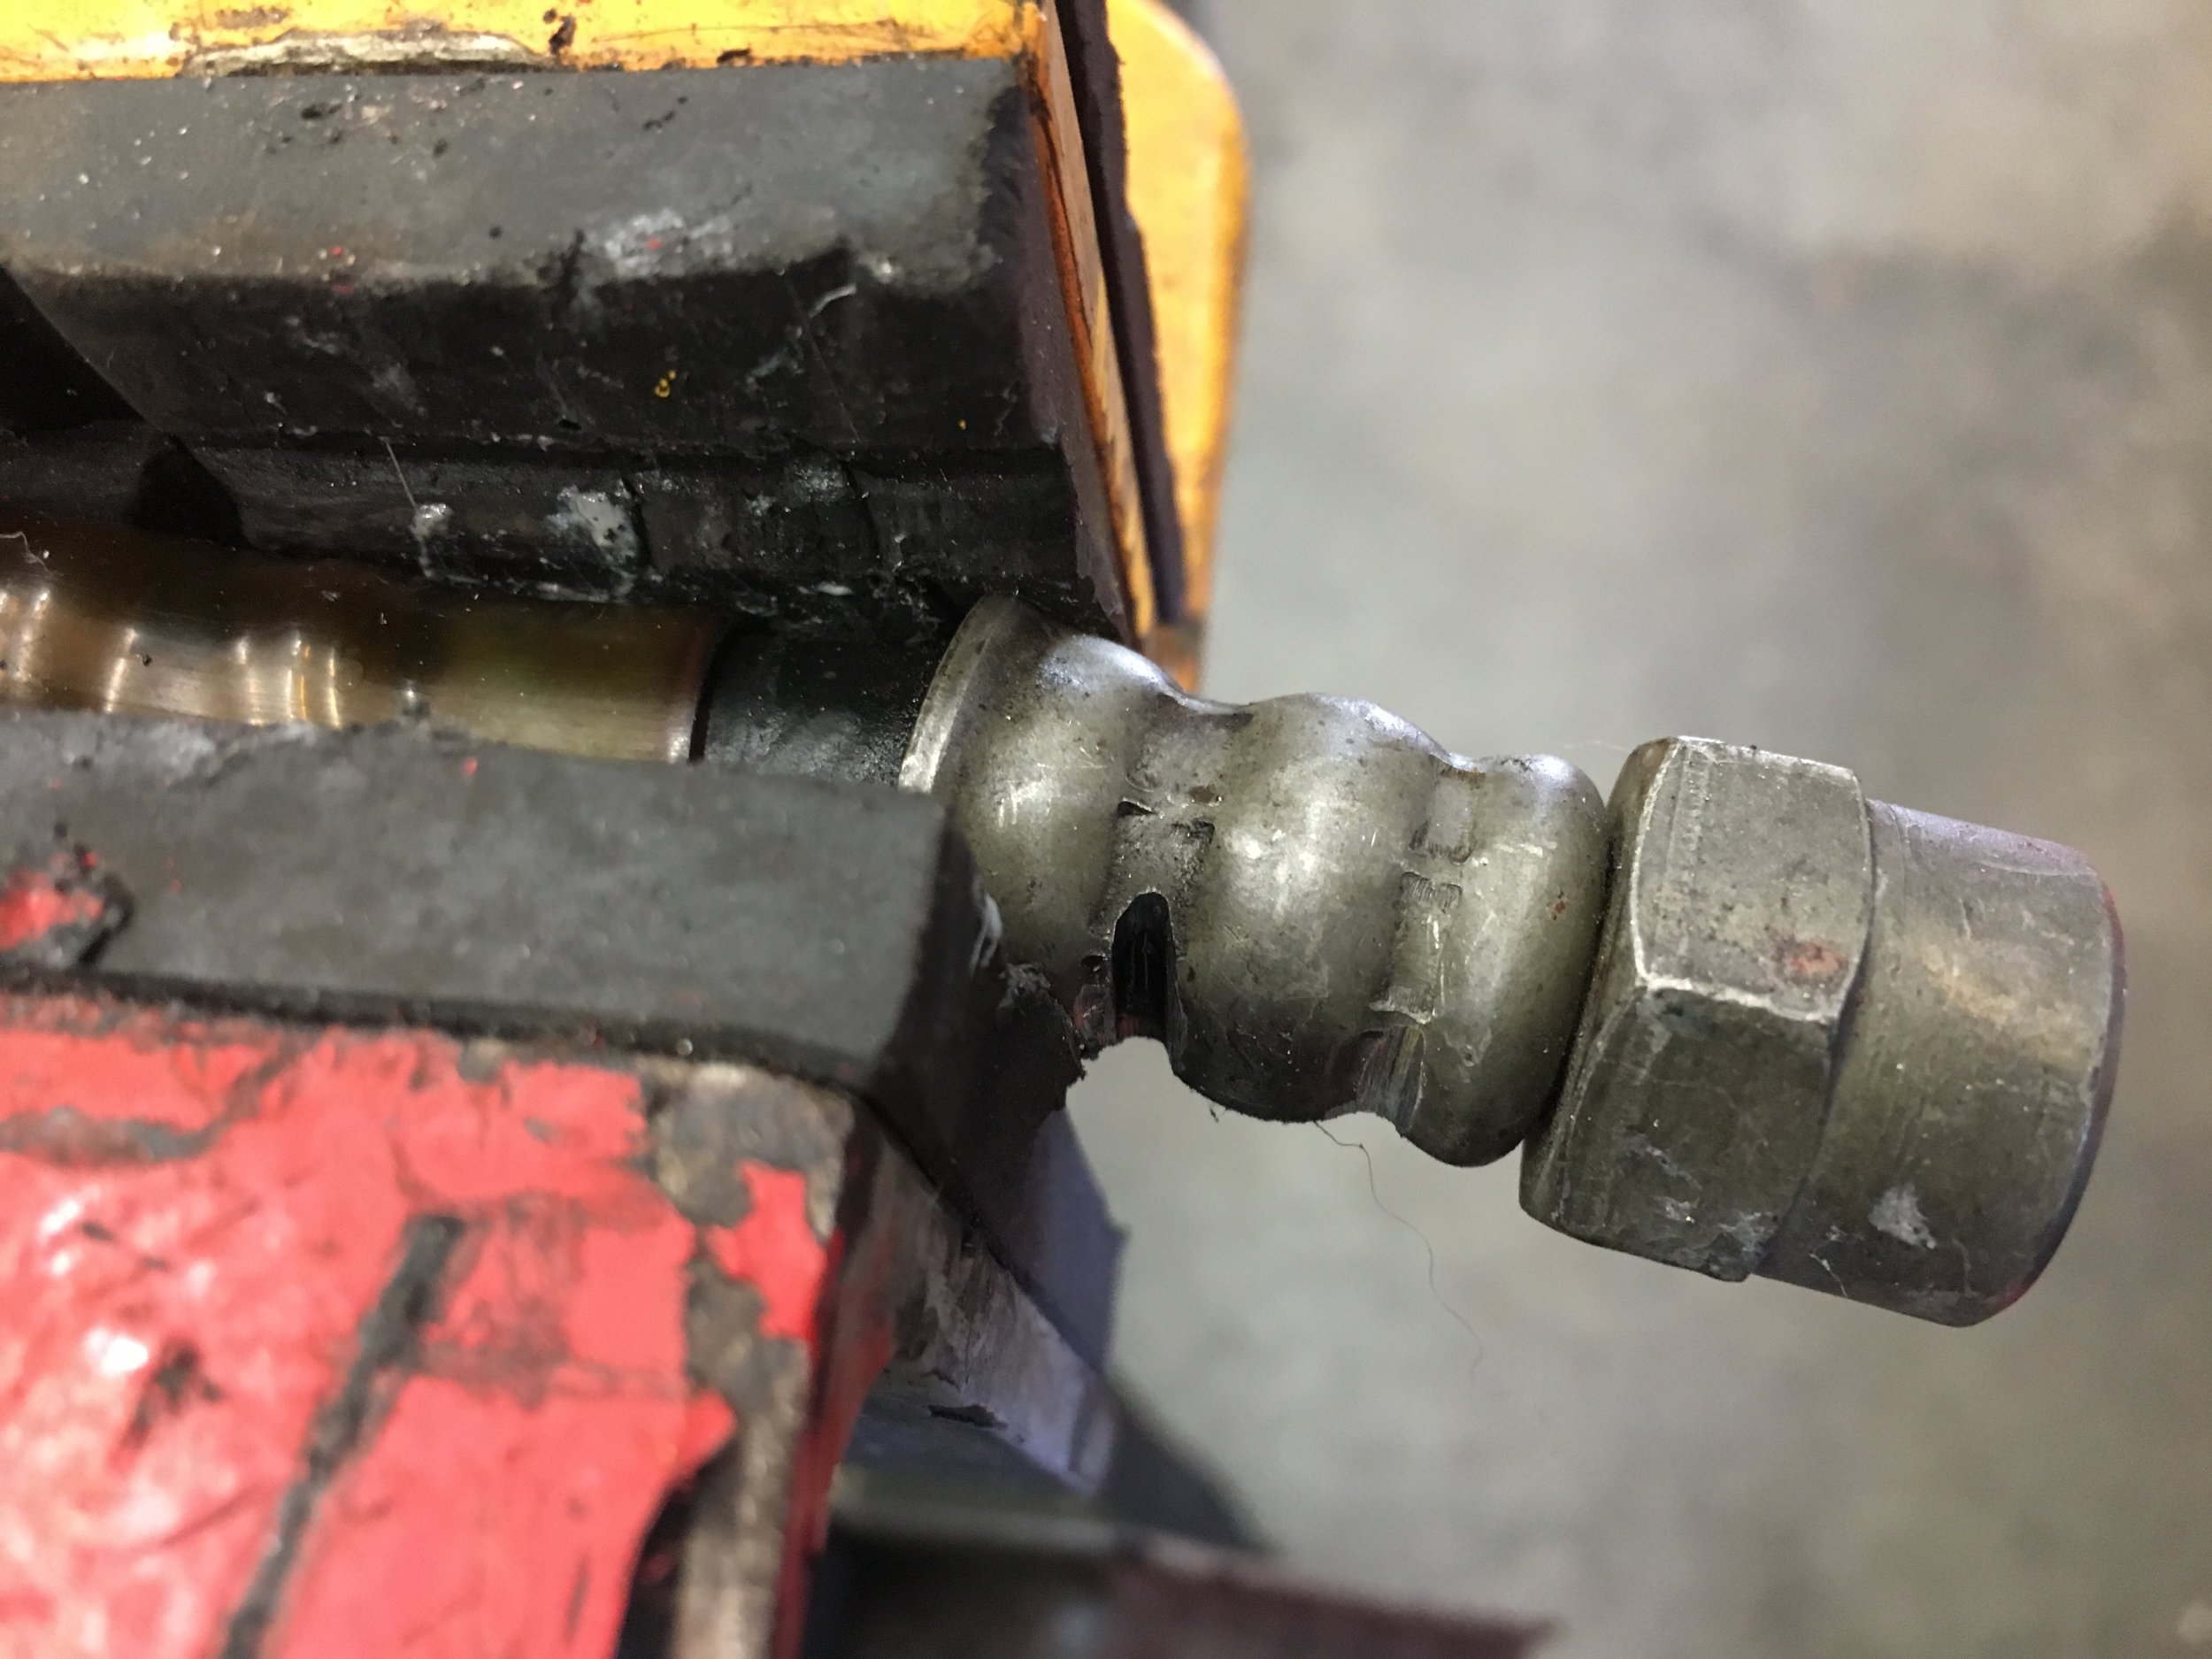

A steady hand is needed here, oh and wear Safety glasses too.
Cut all around the crimps and then carefully cut parallel to the hose.


Do not cut the “ring” closest to the fitting.
You are releasing the crimp tension here and this will allow you to pull the fitting out of the hose. Don’t cut the ring closest to the fitting.

I used some vice grips and a razor blade to trim some hose and get the crimps off.
When freed from the hose, the ends will look like this.

There’s a regular looking hose fitting hiding in there.
Clean them up with an abrasive pad or better yet a mounted fine wire wheel. They’ll look like this cleaned up.

Are those custom AN fittings?
Cut the new hose to approximately the same length. Put your fuel injection clamps on and I used a little bit of white grease to help the hose slide on the fittings, as it was a bit tight.


Looks mint. I said it before, I’ve done this, I’ve recommended it to several people and it’s worked great for them too. This is as good or better than the original crimped hose. That extra clear hose over it is a factory thing they did. I happened to have some left over from restoring the Galant. It’s totally not needed, I just did it because I could.

It ended up a tiny bit longer than the original but it works great, no leaks at all.